
5 Easy Steps For An Awesome Knitwear Finish
You’ve spent hours diligently working away on your project, following all the instructions to the letter from start to end of your pattern. You’ve got to the end of the knitting and now you just need an awesome knitwear finish and it’ll be complete!
It’s so tempting to quickly gloss over the last bits impatiently so you can just wear the finished garment. But wait! Finishing is one of the most important steps, and if you rush it or skip steps, that momentous try-on that you’ve been waiting for could be a disappointing let-down.
Finishing knitwear doesn’t have to be arduous. Taking a little more time to give your project the last points of love and attention it deserves. It will give you the best finish you can get for your hours of time lovingly spent working on your project.
This advice applies equally to hand made knitting or crochet projects.
Follow these tips to make sure you love what you’ve made. Oh and one more thing – don’t throw out all of those yarn ball bands just yet! Keep one for now… see the last tip for the reason why.

Choose the most appropriate cast-off technique
Using the most appropriate cast-off (or bind-off) technique can significantly improve the overall finish of handcrafted knitwear. Choosing the right method of finishing off the stitches impacts both functionality and aesthetics, giving the finished item a professional and polished appearance.
A stretchy cast-off, such as the Jeny’s Surprisingly Stretchy Cast-Off, is ideal for cuffs, socks, or other areas requiring elasticity. It prevents the fabric from being too tight, ensuring comfort and wearability.
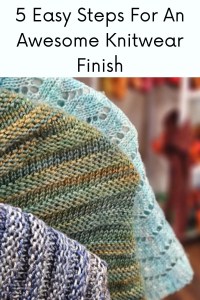
A tubular cast-off gives similar elasticity with a seemingly invisible edge, ideal for ribbed edgings. This is what I used for the ribbing on the brioche scarf pictured.
A standard cast-off creates a firmer edge, suitable for structural elements like shoulders or decorative finishes. A 3-needle cast-off gives the same structure but with minimal bulk at the seam. This is what I used in my Mordros Sweater design.
For lace projects, a picot cast-off can enhance the design’s intricate details with a delicate edge.
Using a cast-off technique that complements the stitch pattern also maintains the integrity of the design. Matching tension is crucial; an uneven cast-off can distort the piece’s shape, detracting from the overall look of the item. Additionally, experimenting with decorative cast-offs, like the i-cord or sewn bind-off, can add unique touches that give the garment an extra special touch.
Ace those seams
The number of seams can be minimised by opting for a top-down construction. However you may still have some small areas of seaming to do.
We’ve all seen handknit sweaters with hastily oversewn bulky seams, not lining up properly and with parts of the seaming sticking through to the outside. What a mess!
Nine times out of ten, your best friend will be Mattress stitch. It is very easy to do with a little practise. The result is neat, even seams that pretty much disappear into your work – well worth the effort.
I used mattress stitch to seam the body and sleeves of my Mordros Sweater design.
Just ensure that you don’t use this technique on the edge stitches of your seam. Work 1 stitch in from the edge to get an awesome knitwear finish.


Consider the yarn ends
You will need to join yarns when using different colours or multiple skeins in your project. Yarn ends poking through the finished fabric are generally not a welcome sight.
When and how you join yarns in your project can make a huge difference. The main goal is to avoid joining yarns in the most visible areas, such as the front of a sweater. Sewn-in ends can often create a small bump in the knitting which can be easily noticeable!
Carry or cut?
You may be able to carry different colours instead of cutting them. For example, this would work if you’re knitting 2 rows of one colour, then 2 rows of another colour. In this case, twist the yarns when you switch colours to avoid getting a hole.
The optimal location for joining a yarn is at the start of a row. The yarn ends can then be easily incorporated into the seam when the project is joined together.
If you’re knitting a seamless project, aim to join yarns in a less visible area. This could be at the sides of a garment or the edges of a scarf. Similarly, switch yarns that you’re carrying at a side of a garment, where any differences will be less obvious. I did this when knitting the Gemini top pictured, using three co-ordinating colours of my hand dyed Egyptian DK yarn.
Crochet can be a little more forgiving with this as it’s generally more textured. This means that yarn ends can be hidden away more easily.
Block your project for an awesome knitwear finish
Many people seem to think there’s some kind of complexity around blocking, but it’s really quite a simple process.
Yes, I know you just want to get on with wearing your new top. But hey, you want it to look great on, don’t you? And you’d love to get genuine compliments about how fantastic it looks when you tell everyone you’ve made it yourself, yes?
For an awesome knitwear finish, don’t skip this step.
This is how I do it. Thoroughly wet the project in a little warm water with a splash of Yarn Food. Gently squeeze out the water then roll in a towel to soak up the excess. Unroll, stretch out and pin to the required measurements, then leave to dry.


Look after your knitwear long-term
So finally you got to enjoy the satisfaction of wearing your own handmade garment. It fits, looks great, and you got lots of great comments on it.
Now you’ve worn it a few times, it really could do with a little wash to refresh it. Do not throw it in the washing machine! Again, be mindful of the time you took to create this unique garment, and give it some tender loving care going forward.
A gentle warm handwash is usually the best option. Precise washing instructions are often specified on the yarn ball band, so it’s a good idea to keep one of those until you’ve washed the garment for the first time.
Use a gentle no-rinse washing product such as Yarn Food yarn wash to preserve the look and feel of your knitwear.
Once your garment is dry, take a little time to carefully go over it with a lint removing comb. Luxury yarns are more likely to pill and bobble, but using a lint remover now and then keeps your garment looking as good as new.
So that’s it! You’re all set to enjoy your knitwear for many years to come. Considering how long it took to create it in the first place, it’s not so long-winded to end it with an awesome finish is it? Enjoy!